Layens Frame Plans
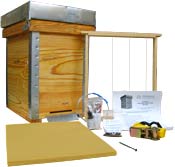
LAYENS HIVES & FRAMES AVAILABLE FROM OUR STORE >>
Hives include all frames, fully assembled & ready to go
Wintering bees naturally move up on honeycomb. The classical Layens frame was designed to be deep enough for successful overwintering and rapid spring buildup. It mimics the size of comb found in tree hollows and has been in continuous use since the 19th century. Over one million hives use the Layens frames today, and it is my favorite. It offers ideal colony development conditions consistent with honey bees’ biology, and all frames are positioned on the same level horizontally so there are no heavy supers to lift!
The top bars are made to touch — this helps to retain heat inside the brood nest and minimizes disturbance during inspections. According to numerous authorities this frame is perfect for wintering in cold climates, and beatifully works in the south as well.
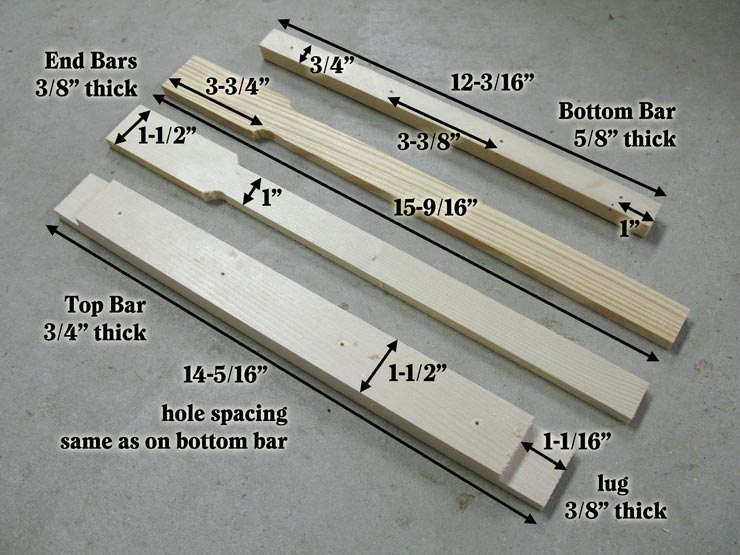
The Layens frame consists of four parts:
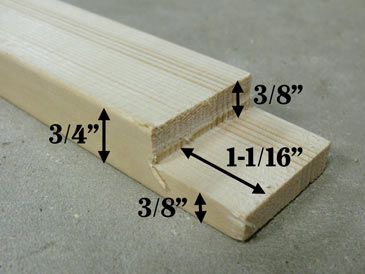
- Top bar — 14-5/16” x 1-1/2” x 3/4”, with 1-1/16” x 3/8” rabbets cut on two ends. It has 4 holes (3/32”) drilled along the center of the bar 1” from the rabbets and 3-3/8” between holes.
- End bars (2) — 15-9/16” long x 3/8” thick. The wider part is 1-1/2” wide and 3-3/4” long; it then tapers to the thinner part which is 1” wide.
- Bottom bar — 12-3/16” x 5/8” x 3/4”. It has 4 holes (3/32”) drilled along the center of the 3/4”-wide side 1” from each end and 3-3/8” between holes.
Making frame parts
The top bar is most easily built out of “one-by-” stock (actual thickness: 3/4”). Cut a piece of board 14-5/16” long; cut rabbets 1-1/16” x 3/8” on both ends of the board; then rip it into 1-1/2” bars.
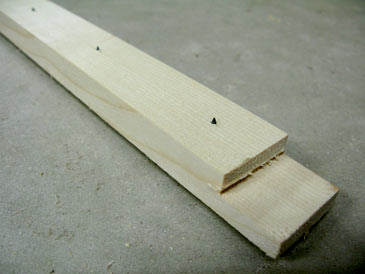
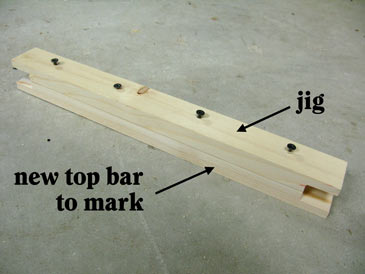
Mark the holes and drill from the bottom side of the top bar (the side that will look inside the frame). 3/32” drill bit and a hand-held drill do the trick. To mark holes quicker, make a jig: take a top bar with the holes you just drilled and drive 1-1/4” drywall screws into the holes so they protrude by 1/16” on the bottom side. Press the jig on the new top bar, and hole positions are impressed. Voila!
To make end bars I cut a 15-9/16” piece of “two-by-” stock (actual thickness 1-1/2”), slice it in 3/8” planks, then take 1/4” off each side with a router along 12” of the length, leaving 3-3/4” of the plank intact (1-1/2”). This results in end bars that are 1-1/2” wide on top and 1” wide further down.
The bottom bar is simply a plank 12-3/16” x 5/8” x 3/4” ripped from any “one-by-” or “two-by-” stock. The holes along the center of the 3/4” side are made the same way as on the top bar (drill from the top side of the bottom bar, i.e., from the side that looks inside the frame).
Assembly
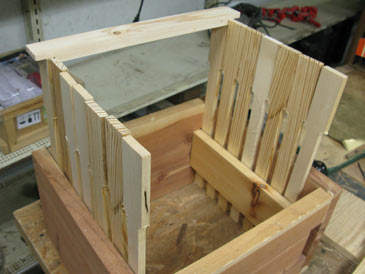
It is handy to make a jig that will hold the end bars square while you attach the top bars and bottom bars. Click here for jig plans. If you don’t assemble too many frames, you can just check the angle with a square as you nail them together. Apply a bead of wood glue and drive two 1” staples (or hammer in nails) through the top bar into the end bar; then one through the end bar back into the top bar; then one staple through the end bar into the bottom bar. The frame is ready. Wait at least 24 hrs for the glue to cure before wiring.
Wiring
First, you’ll need to staple the top and bottom bars to prevent tensioned wire from eating into the wood. This stapling can also be done before frame assembly. Use staples with a 3/8” leg. Staple crown size can be either 10 mm (the standard T50 staples of manual staplers) or 1/4” (the narrow crown for pneumatic staplers).
IMPORTANT: staple positions depend on whether you wire the frame using a wiring jig or without a wiring jig. If you use a wiring jig, use the stapling pattern on the wiring jig page.
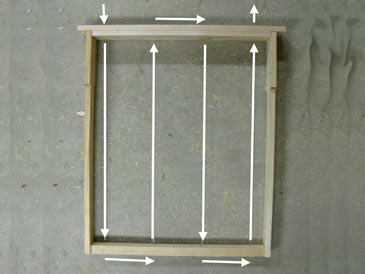
For wiring without a wiring jig: see the images below. Red dots represent holes. On the top of the top bar, the staples are to the left of holes 1 and 3 and to the right of holes 2 and 4.On the bottom of the bottom bar, the staples are to the right of holes 1 and 3 and to the left of holes 2 and 4.
Run wire through the holes as shown. Drive 3/4” or 5/8” nails outside the top bar’s holes 1 and 4. Wind wire around one nail, drive it in, twist wire to break it off. Tension the wire, pulling by each segment of the wire. Then wind the end around the second nail, drive it in, and twist the wire to break it off.
Installing wax foundation
You can then install wax foundation into the frames. Put a sheet of foundation on the wires and run 12-volt direct current through the wires, heating them up, which embeds them into the wax. If you want to go foundationless (that is, letting the bees build their own comb without a full sheet of foundation), just embed a 3” strip of foundation along the top bar to get bees started in a straight line. Either way will work well.
Bees love these frames. They leave plentiful stores up top, with some empty cells on the bottom for the cluster to form on.
LAYENS HIVES & FRAMES AVAILABLE FROM OUR STORE >>
Hives include all frames, fully assembled & ready to go
If you haven’t signed up for our email list yet, please join it below so we can notify you when detailed Layens hive management recommendations and more free plans become available. (Only 2-3 emails per year, and you can unsubscribe at any time.) With best wishes to you and your bees,
— Dr. Leo Sharashkin, Editor of “Keeping Bees With a Smile”


