


Pollen — How to Use a Pollen Collector
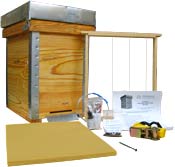
POLLEN COLLECTORS & OTHER EQUIPMENT AVAILABLE FROM OUR STORE >>
Hives, swarm traps, honey extractors, etc.
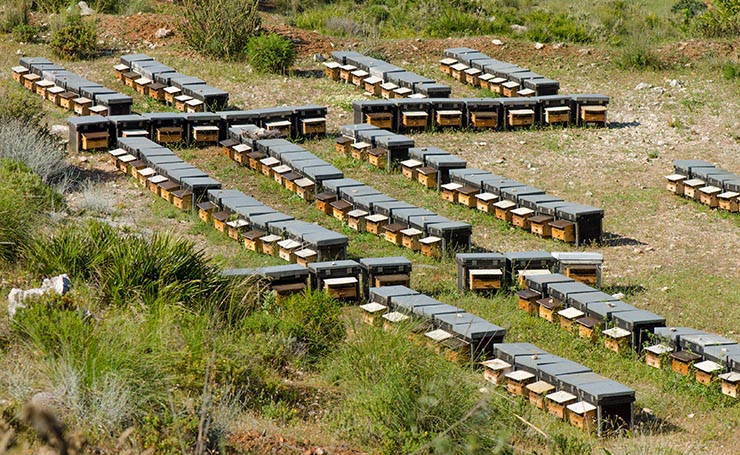
A typical sight in Spain: rows of Layens horizontal hives with a pollen collector at every entrance. But in the US, most beekeepers never harvest pollen, and those who do often use it for making protein patties for bees (see recipes in Raising Honeybee Queens), rather than enjoying this superfood or offering it for sale.
Fresh bee pollen – tasty and healthful – is very easy to harvest using a pollen collector, a great tool which pays for itself in just a few days. Let’s see how it works.
How Pollen Collector Works
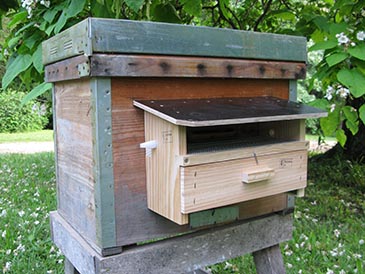
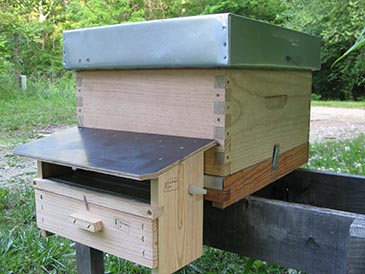
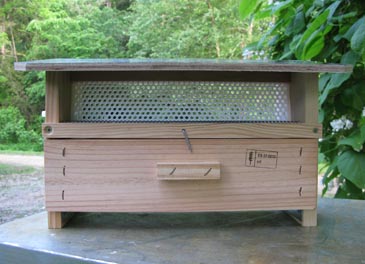
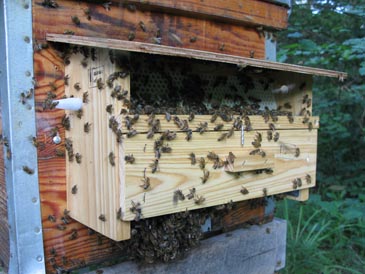
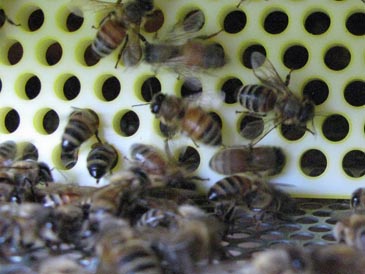
A pollen collector (also called pollen trap) is a covered porch over the hive entrance. It has a door with many holes for the bees to pass through, metal mesh floor, and a drawer to catch the pollen dropped by the bees.
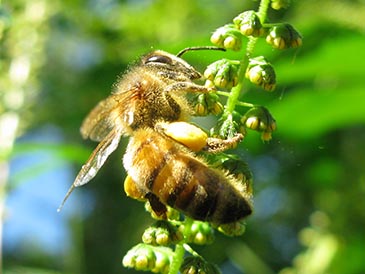
Bees bring balls of pollen in special baskets on their hind legs. As the bee squeezes through a small hole to enter the hive, the pollen pellet is knocked off and falls through the mesh floor into the drawer. When done carefully, harvesting pollen in this way will not hurt the colony.

Prepare for use
1. Paint it!
It is best to paint all exterior wood surfaces, including the lid, before use. In very dry climates that barely get any rain during the pollen-harvest season (say, Texas) painting is almost optional, but everywhere else painting will prolong the useful life of the trap.
Paint the lid (top, underside, and all edges), the outside of the box, and the drawer (the walls and the front panel). Pay special attention to all edges with exposed wood/plywood grain – seal them well. No need to paint inside the drawer. Do not paint the metal parts or the white plastic door with holes.
What paint to use? If you want to preserve the wooden look of the trap, use exterior polyurethane. But water-based exterior paint (latex/acrylic), satin sheen, light color, is even better – one coat of primer, then one coat of paint.
Useful tips. I use a cheap 1” chip brush for this job. Take the drawer out, turn the trap upside down and put it on its roof. Rotate and paint all surfaces including the underside of the roof. Flip it right side up, put two nails under each “leg” so it does not stick to the supporting surface, then paint the top of the lid and finally, the drawer.
How long does it take? I can apply one coat of paint in 15 minutes. But today, the rain is tapping on the roof of the shop, I drift away thinking about bees, flowers, life, Winnie-the-Pooh, my family, and other matters of importance – and it took twice as long...

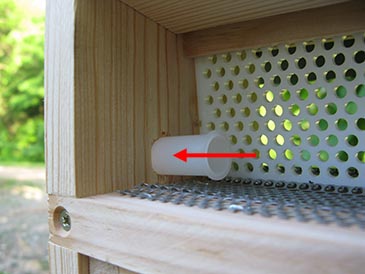
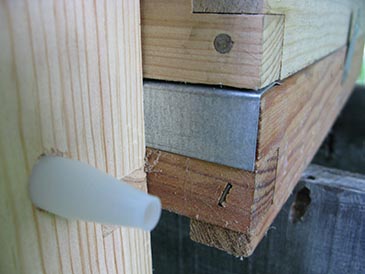
2. Insert the plastic cones (drone escapes)
The two plastic cones are for releasing drones (more on that below). Insert them, from the inside, into the holes of the upper chamber, the narrow end facing out. Press them or tap them gently with a hammer until the wide end of the tube is flush with the interior wall of the trap.

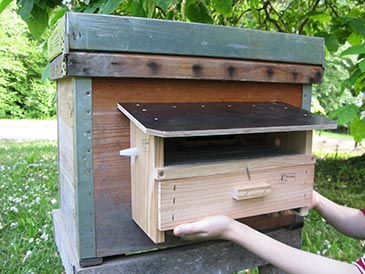
Mount your pollen collector
There should be no gaps between the upper chamber and the hive wall – bees should only be able to re-enter the hive through the trap’s perforated white door.
If your hive has multiple entrances, decide which one to use for pollen collection. Open it, close all other entrances, and make the bees use that entrance for at least a week so they become well used to it.
Generally, using a top entrance is more convenient. Our 12-frame, 14-frame, four-entrance 20-frame insulated hive, and 25-frame Layens hives all have top entrances ideal for installing a pollen trap.


To mount:
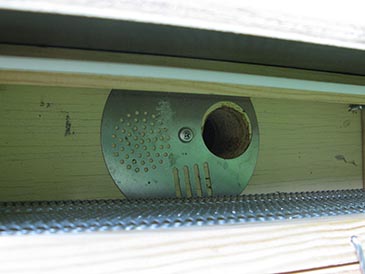
- Position on the front wall of the hive so the upper chamber of the trap covers the entrance completely. This applies both to slot entrances and round entrances as shown above.
- Mark the top of the trap roof with a pencil; mark the corners.
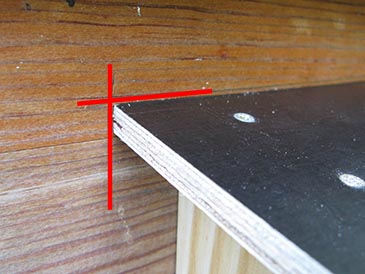
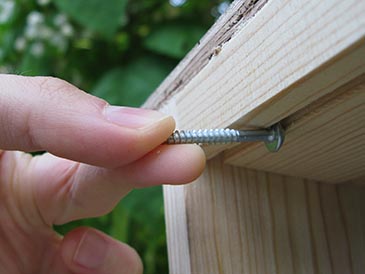
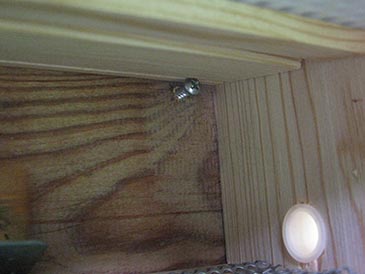
- From each corner mark, go 2-1/2” in and 1-1/4” down and drive in two 1” pan-head screws. Let the screws stick out about 3/8” to 1/2”.

- Put the trap against the wall of the hive just above the pencil line and push down. The heads of the screws should go into the groove on the underside of the lid and hold the trap in place. Adjust the mounting screws as necessary so the trap is snug against the hive wall.
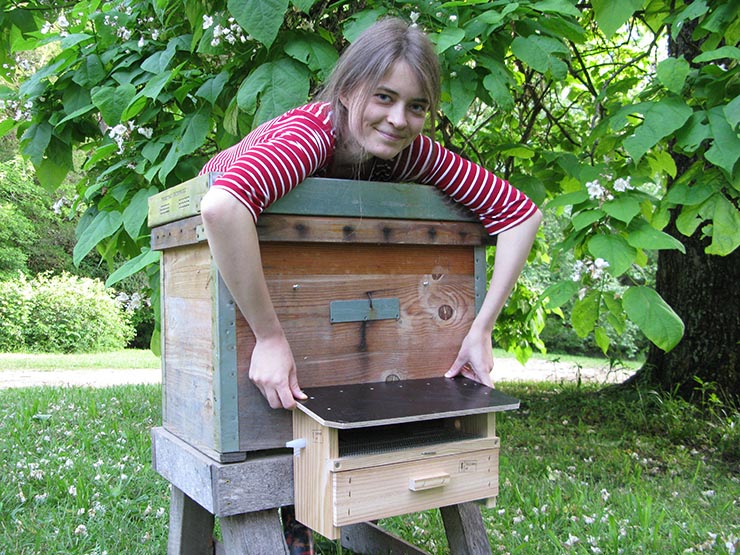
As Lada demonstrates, you can mount the pollen collector at the bottom entrance as well – as long as your hive is elevated so the pollen trap can hang down.
If you use Langstroth (vertical) hives, this pollen trap can be used without modification if the bottom board is flush with the hive box and does not have a landing board in the front. The vertical-hive entrance is wider than the trap – cover the gap with a piece of folded metal so bees can only enter the hive through the pollen collector door.
Finally, if your hive is decorated with valuable artwork and you prefer not to pierce it with the two screws, use a ratchet strap to hold it in place (run the strap under the roof overhang).

When to collect pollen
Caution during brood buildup periods
Bees need a lot of pollen to rear brood, so preferably do not take their pollen during the periods of intense brood buildup – in the spring (spring buildup) and in the fall, the last four weeks before the first frost (raising the winter generation of bees and preparing winter stores). If you do harvest pollen in the spring, alternate 3 days on (for you) – 3 days off (for bees), as explained below.
Avoid the swarming season!
CAUTION!!! Make sure your hive is not going to swarm when the pollen collector is in operation! If the colony swarms, the mother queen will leave with the swarm. The new virgin queen returning from her mating flight won’t be able to re-enter the hive when the pollen collector door is down – she’s too big to fit through these holes – and your hive will become queenless.
So, to be safe:
- Make artificial swarms (splits) four to six weeks ahead of pollen trap installation. See Keeping Bees in Horizontal Hives on good artificial swarming techniques.
- Make sure the colony is not congested inside – give bees plenty of frames with drawn comb (preferred) or foundation. See our free guide If Bees Run out of Room.
- Collect pollen during the part of the season when swarming is unlikely in your area. This usually means the summer.
A tip: Typically, bees do not swarm during the dearth season – when abundant nectar is not available. To learn your honeyflows, put one hive on a platform scale and take readings daily or weekly.
Avoid the blooming of commercial crops
If you are surrounded by commercial crops (e.g., corn), do not collect pollen when these crops are in bloom. The pollen of conventional (non-organic) agricultural crops contains pesticides and is not good for you.
Good timing – an example
In the Ozarks of southern Missouri, the spring brood buildup is March to April; most swarming happens in May to early June; and the fall brood buildup is September. This leaves me the safe window from mid-June to end of August for my pollen harvest. Of course, the actual dates may shift every year by a couple weeks, depending on the weather.
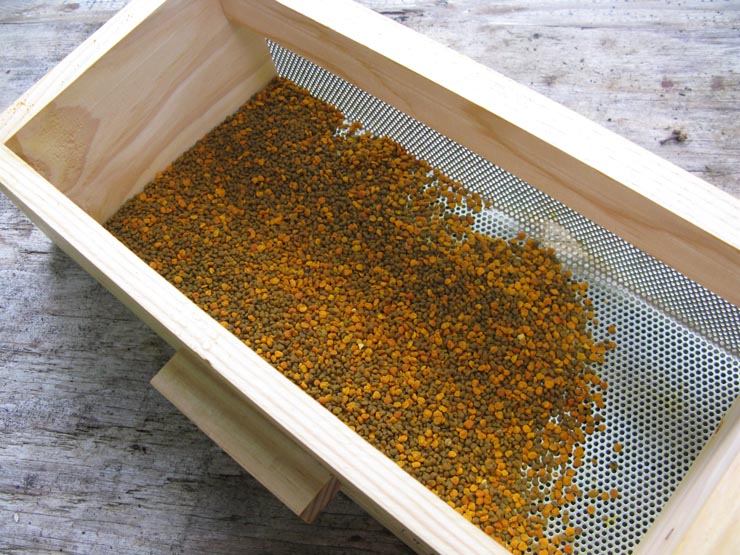
When deciding on the right time to hang my pollen trap, I also consider what pollen harvest would offer the most value. Here in the Ozarks it is, hands down, the blooming of the sumacs (Rhus spp.). This is a wild plant, so pesticide contamination of pollen is not an issue; the quantity is HUGE; and the quality is to die for – the Peterson Guide to Medicinal Plans of North America ranks the sumacs #1 of all species for their natural antibiotics and other good stuff. That is the kind of pollen we want! And it looks awesome – bright-orange.
In my location, sumacs bloom from June 15 through the first week of July. Perfect timing. After the sumacs are done, I can safely continue trapping pollen through July and August, too.
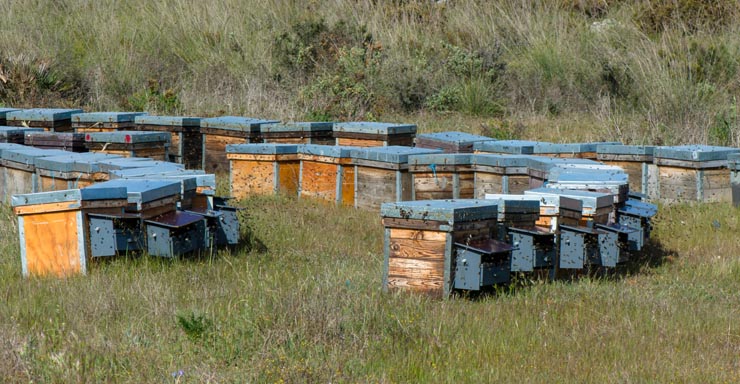
Strong hives collect more pollen
Strong (more populous) colonies collect much more pollen than the weak ones. Besides, with continuous pollen-trapping bees sharply curtail brood production – so use very populous colonies to begin with.
Real-life example (1 tbsp = 10 g of pollen): during the blooming of sumac here,
- a strong hive collects 8 tbsp per day (1/2 cup)
- a medium hive collects 4 tbsp per day (1/4 cup)
- a weak hive collects 1 tbsp per day (not worth it!)
But make sure the colony is not overpopulated / on the brink of swarming. If a hive beards heavily in mild weather, it is overpopulated – don’t use it for pollen collection, and see our article If Bees Run Out of Room.
First use
The trap collects pollen when the plastic perforated plate is all the way down (it swivels and can be opened and closed). As bees squeeze though the holes, pollen is detached and falls into the drawer. During pollen collection, all over hive entrances must be closed; otherwise bees stop going through the pollen trap and you lose your harvest.

First week – leave FULLY OPEN
When the pollen collector is first installed, leave the door fully open (up) for at least 3 days (but preferably a week or longer) so bees get used to the pollen collector. You can then fully close the perforated gate and start pollen collection.
First use – disoriented bees – IMPORTANT!
When you first close the door, bees become seriously disoriented. (Imagine your front door blocked so you get in and out through the crawl space!) It only takes them minutes to figure out they can leave the hive through the little holes, but learning to re-enter through the same holes takes longer – three days of good flying weather. Some bees may camp outside the hive the first night, bearding down from the pollen collector in protest. The second day you will see some bees confidently diving through the holes. By the end of the third day all bees readily get in/out through the holes and traffic gets back to normal.
First use – drones can’t get back in – IMPORTANT!
Drones that escape through the drone escape tubes cannot return to the hive because the entry holes are too small for them. If your hive has lots of drones, they may congregate at the front door in large numbers preventing worker bee entry. Check the front of the trap daily the first few days. If it’s all covered in drones, throw them into a bucket of water. I’m sorry! Tip: if you collect pollen in the summer, after the main swarming season is over, there will be few drones.
Ongoing operation
Pollen is bees’ only source of protein. They only have limited supply inside the hive and need to be able to replenish their reserves before they run out. With this pollen trap model, you don’t have to take it off when not in use – just raise the perforated door and the pollen starts flowing into the hive instead of dropping into the drawer. To open the door, put any kind of hook into a bottom-row hole – a hex key, a bent nail, a screw – and pull.
- Four days on / three days off. After the bees adjust to use the perforated door to come and go, leave it closed (collecting pollen for you) for up to four days. Then open the door for three days (bees replenish their own reserves). Continue to alternate four days closed / three days open. Bees will be well provisioned with pollen (this is important if they rear a lot of brood), but every time you close the door, it will lead to some confusion (although not to the same extent as on the very first day of collection). Tip: the on/off periods can be shorter or longer (2/2, 3/3, etc.), but 4 days on / 3 days off means you open and close the pollen trap on the same days of the week, every week, which is convenient. I close mine on Mondays (back to work!) and open it on Thursdays (have a nice weekend!). The 2/2 schedule results in the least amount of confusion when the screen is closed.
- One week on / One week off. A variation of the above: after the bees learn to use the perforated door to come and go, leave it closed (collecting pollen for you) for a week. Then open the door for a week (bees replenish their own reserves).
- Collect for up to one month, then done. Some beekeepers leave the trap door closed (collecting pollen) continuously for up to a month (and others limit it to 21 days), then open it. After this period the hive will be left with almost no brood and will be severely depleted of bees – keep that in mind: remove the pollen trap and let the colony recover.
Harvesting pollen
Harvest every 1-2 days & freeze
Harvest daily or every 2 days to eliminate the risk of mold (esp. in high-humidity conditions, rain, or heavy dew). Also, with frequent harvest you get the pollen before the ants, small hive beetles, and other insects do!
To harvest pollen: turn the nail, slide the drawer out, pour pollen into a zip-lock bag and freeze. Freezing is the best way to preserve pollen and its properties.
Keep records
If you record your every collection (date, weight, and primary blooming species if you know them), you will get a good feel of when the main pollen flows happen in your area.
Storing pollen
When frozen, the pollen is best used within 1 year, but is still good for 2 years after harvest. Do not dry pollen – it destroys its properties.
Selling pollen
Sell fresh-frozen pollen locally, and you will have no competition! When I have a surplus of my sumac pollen, I sell it at $25/ounce, and there’s a good reason for that. Real-life tasting notes: fresh white clover pollen has pleasant nutty flavor; fresh sumac pollen tastes like papaya. Fresh pollen is moist and you can knead it into a ball. Dried pollen sold in stores has a texture of sawdust and unpleasant bitter / rancid aftertaste – something to be expected when you keep protein food at room temperature!
POLLEN COLLECTORS & OTHER EQUIPMENT AVAILABLE FROM OUR STORE >>
Hives, swarm traps, honey extractors, etc.
Many more guides are in progress, so please join our email list below for more free advice and important updates (no spam; only a few emails per year, and you can unsubscribe at any time). THANK YOU! – we’re working hard to bring you the bees... and the smile!
— Dr. Leo Sharashkin, Editor of “Keeping Bees With a Smile”